Before we get started, make sure that your router and Yealink base station are connected via Ethernet cable and that both pieces or hardware are powered on.
After switching the Yealink device on, please wait 60 seconds for it to boot up. You can now press the "paging" button on the Yealink device and it will tell you the IP address that you'll need to proceed with the configuration (setup) using the below guide.
If connected to a Cool Ideas TP Link router, the IP address will be something like 192.168.0.XXX (the X's being replaced by a number from 2 - 254).
- Open the browser on your computer and navigate to the Yealink device's IP address (please see above if you don't have it).
- Log in using the default username and password (the username and password are both case sensitive)(we'll change this later in the guide):
Username: admin
Password: admin
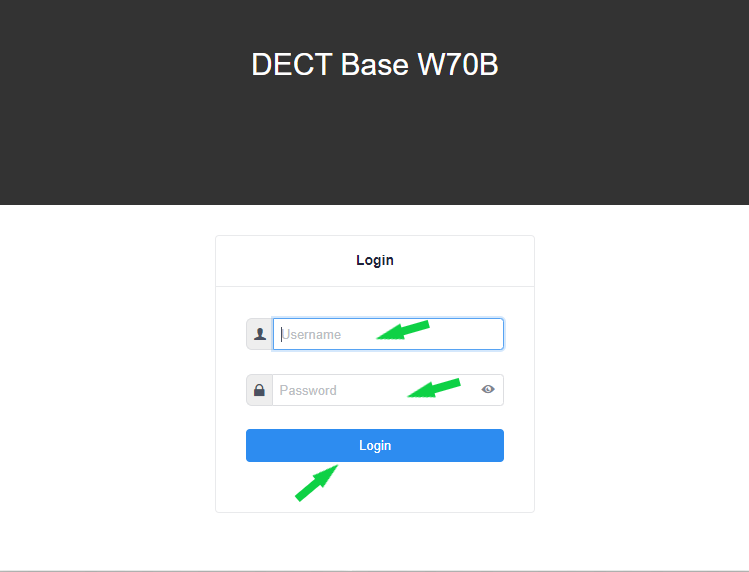
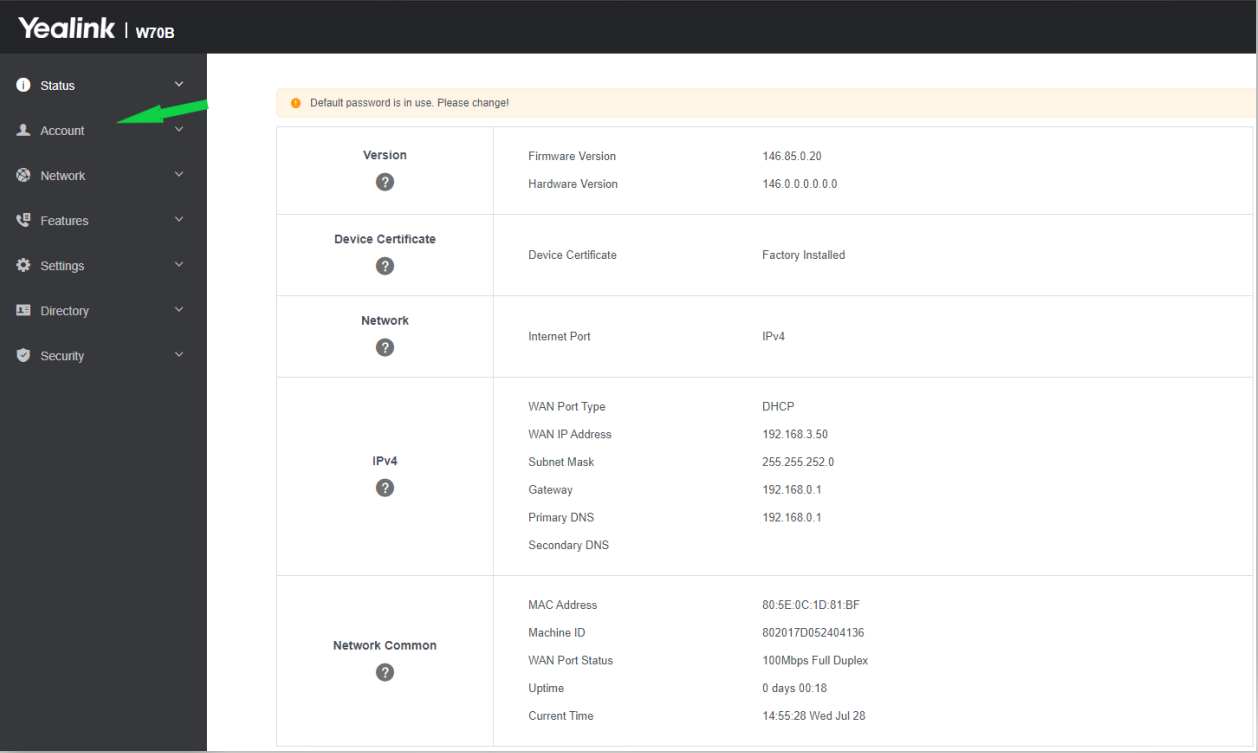
- After logging in, you'll be presented with the Status page.
- Click on the Account tab at the top of the page (see below).
- Make sure that 'Account 1' is selected and enter the details provided to you by our VOIP or Support department. (If you do not have those details, please be sure to mail us here using the account holder's email address, requesting those details).
Note: Any details not mentioned below can be left as default.
The configuration (setup) should be as follows:
- Line Active: Enabled
- Label: *Your 7-digit telephone username* e.g. 1234567
- Display Name: *Your 7-digit telephone username* e.g. 1234567
- Register Name: *Your 7-digit telephone username* e.g. 1234567
- User name: *Your 7-digit telephone username* e.g. 1234567
- Password: *Your telephone password*
SIP Server 1
- Sever Host: sip.telviva.com
SIP Server 2
- Sever Host: sip.telviva.com
- Enable Outbound Proxy Server: Enabled
- Outbound Proxy Server 1: sip.telviva.com
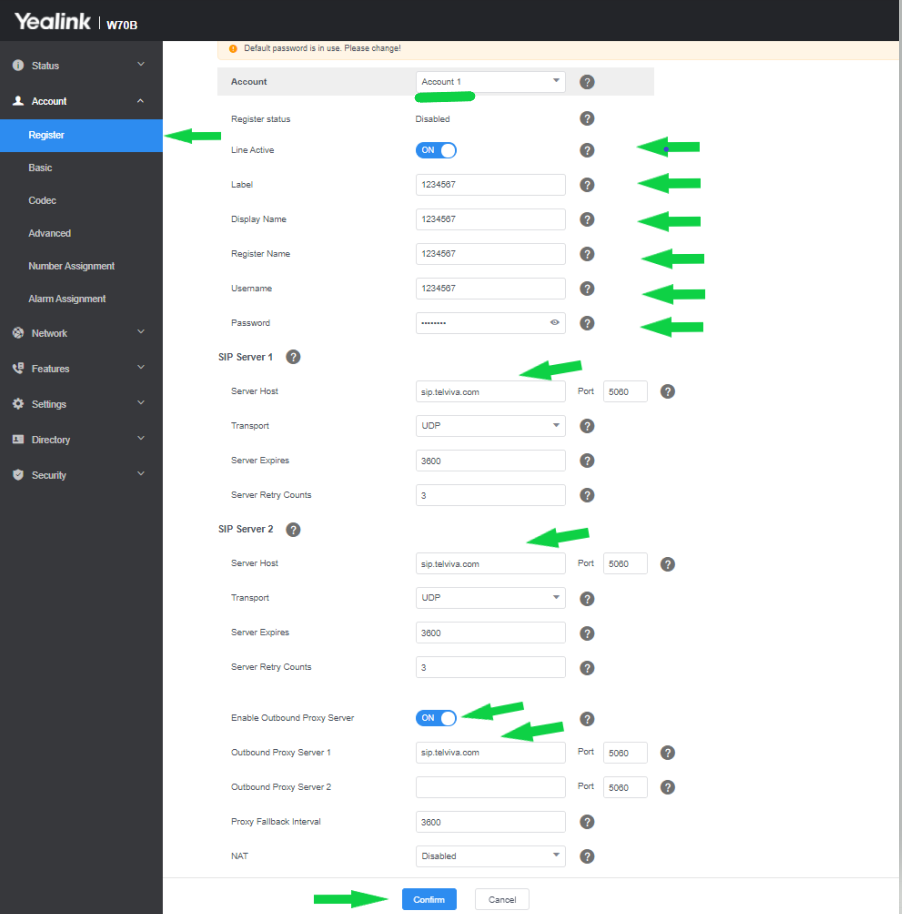
- Click on Confirm to save these settings.
- Once done, the Register Status at the top of the page should now change to 'Registered'.
- The next thing that needs to be configured is the 'codec' of your VOIP phone.
- In the Account tab, you can now select Codec from the menu on the left.
- Once you're on the codec page, use the middle arrow button so that only the G722 and G729 codecs are listed under the Enabled box as per the example below:
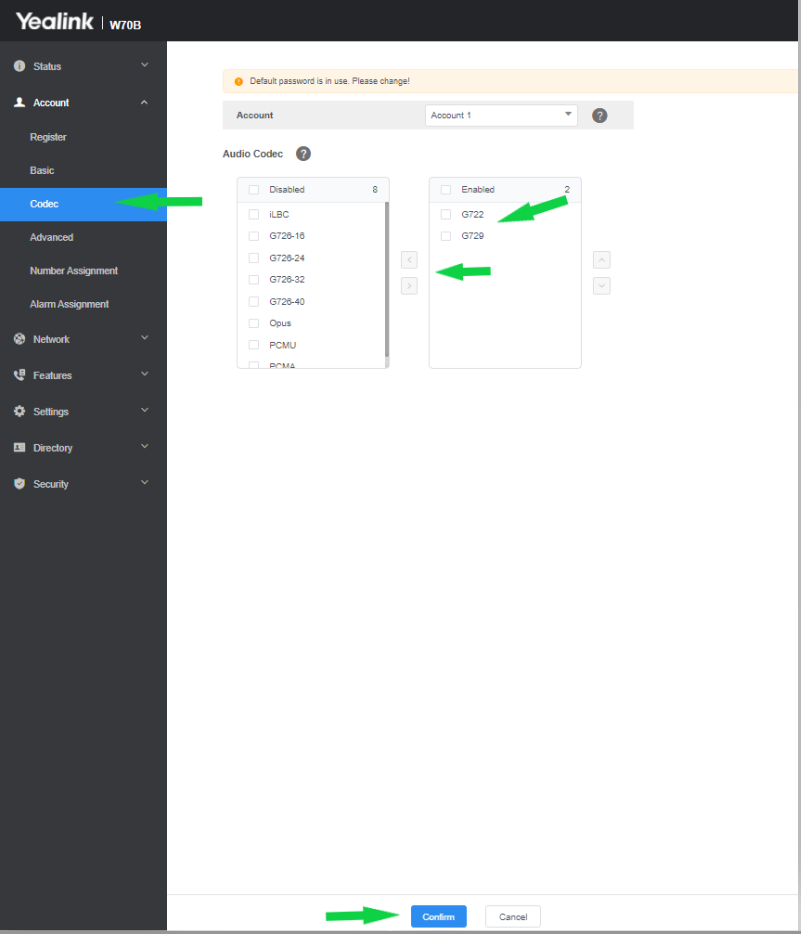
- Click on the Confirm button at the bottom of the page.
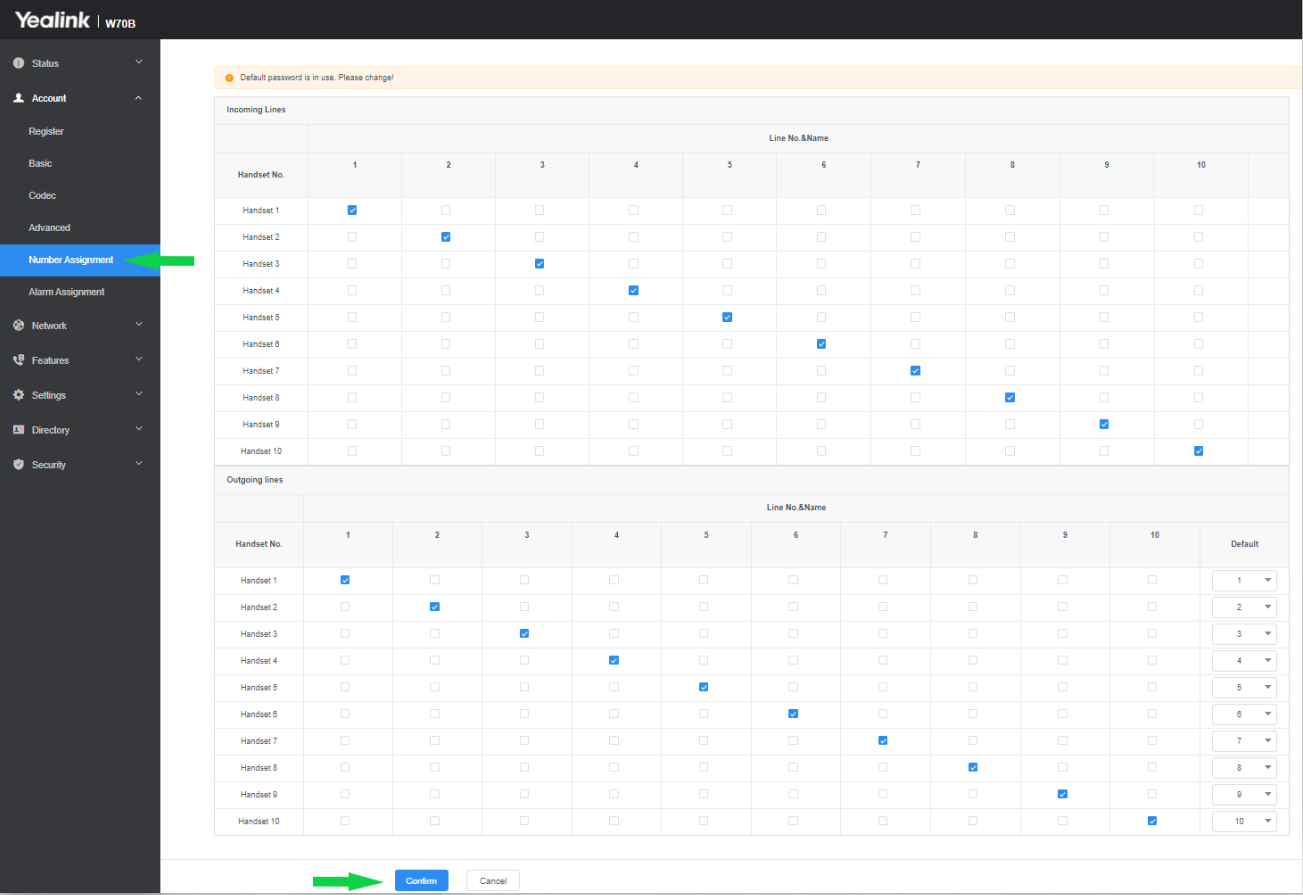
- If you have multiple handsets, you can navigate to the Number Assignment menu and configure your phones to specific accounts. If you only have one handset, please skip to the next step.
- The next step is to enable two settings to make your phone more secure and help prevent any 'ghost calling'.
- Please navigate to Settings then select General Information.
- Please change the following settings on the General Information page.
Accept SIP Trust Server Only: Enabled
Allow IP Call: Disabled
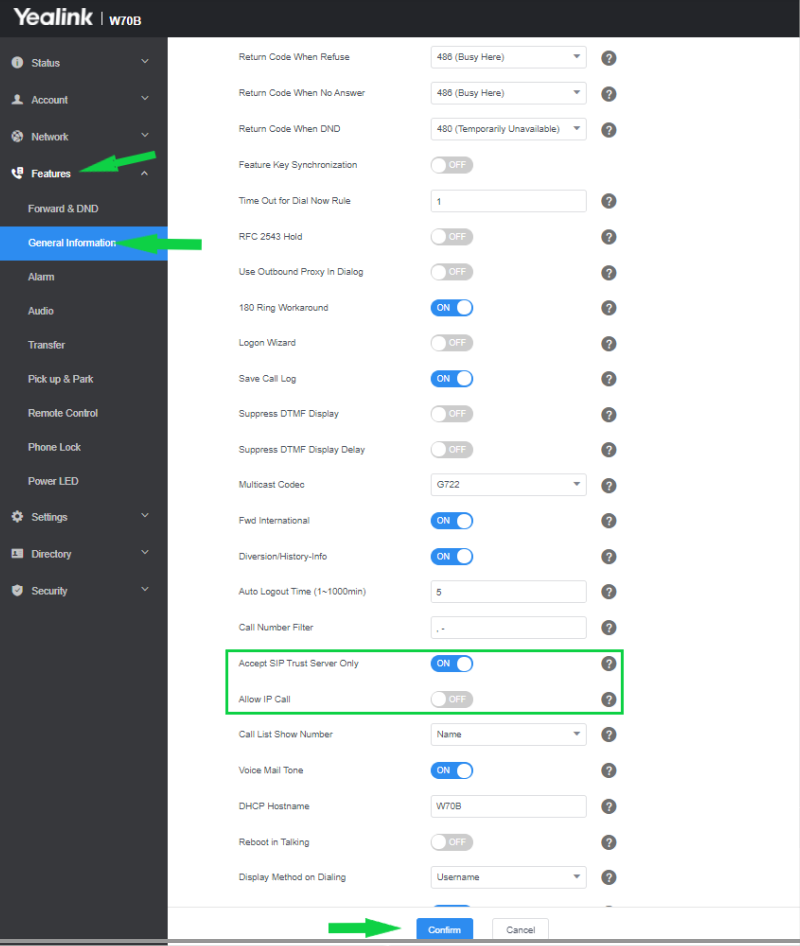
- Click on Confirm.
- Lastly, we need to change the password of your Yealink device to make it more secure.
- Click on the Security tab and select (if not selected automatically) Password.
- Insert the 'admin' password in the Old Password field.
- Type your new password in the New Password and Confirm Password fields.
- Click Confirm.
- You will need to log back in using your new password should you wish to make any further changes.

- To change the date and time on the phone, please click here to access the guide.
Please give us a call on
010 593 2665 or send us an email to support@coolideas.co.za should you have any trouble following the above guide.